Getting started
This page walks a normal workspace member through one successful CLI setup: sign in, create an API token with the right permissions, and authenticate the Spanline CLI. You do not need to be a platform admin.
If you already use API tokens, jump to Guides → API tokens.
What you will need
| Need | Notes |
|---|---|
| Spanline account | Sign in at app.spanline.dev |
| Workspace membership | At least Viewer in the workspace you will target |
| Spanline CLI | Install from spanline.dev/cli |
Step 1 — Sign in
- Open app.spanline.dev/login.
- Enter your work email → Continue with email.
- Enter your password → Sign in.
- If your organization requires MFA, complete enrollment under Account → Security before other pages unlock.
Pick the correct workspace in the header switcher — tokens can optionally be pinned to that workspace.
Step 2 — Open API tokens
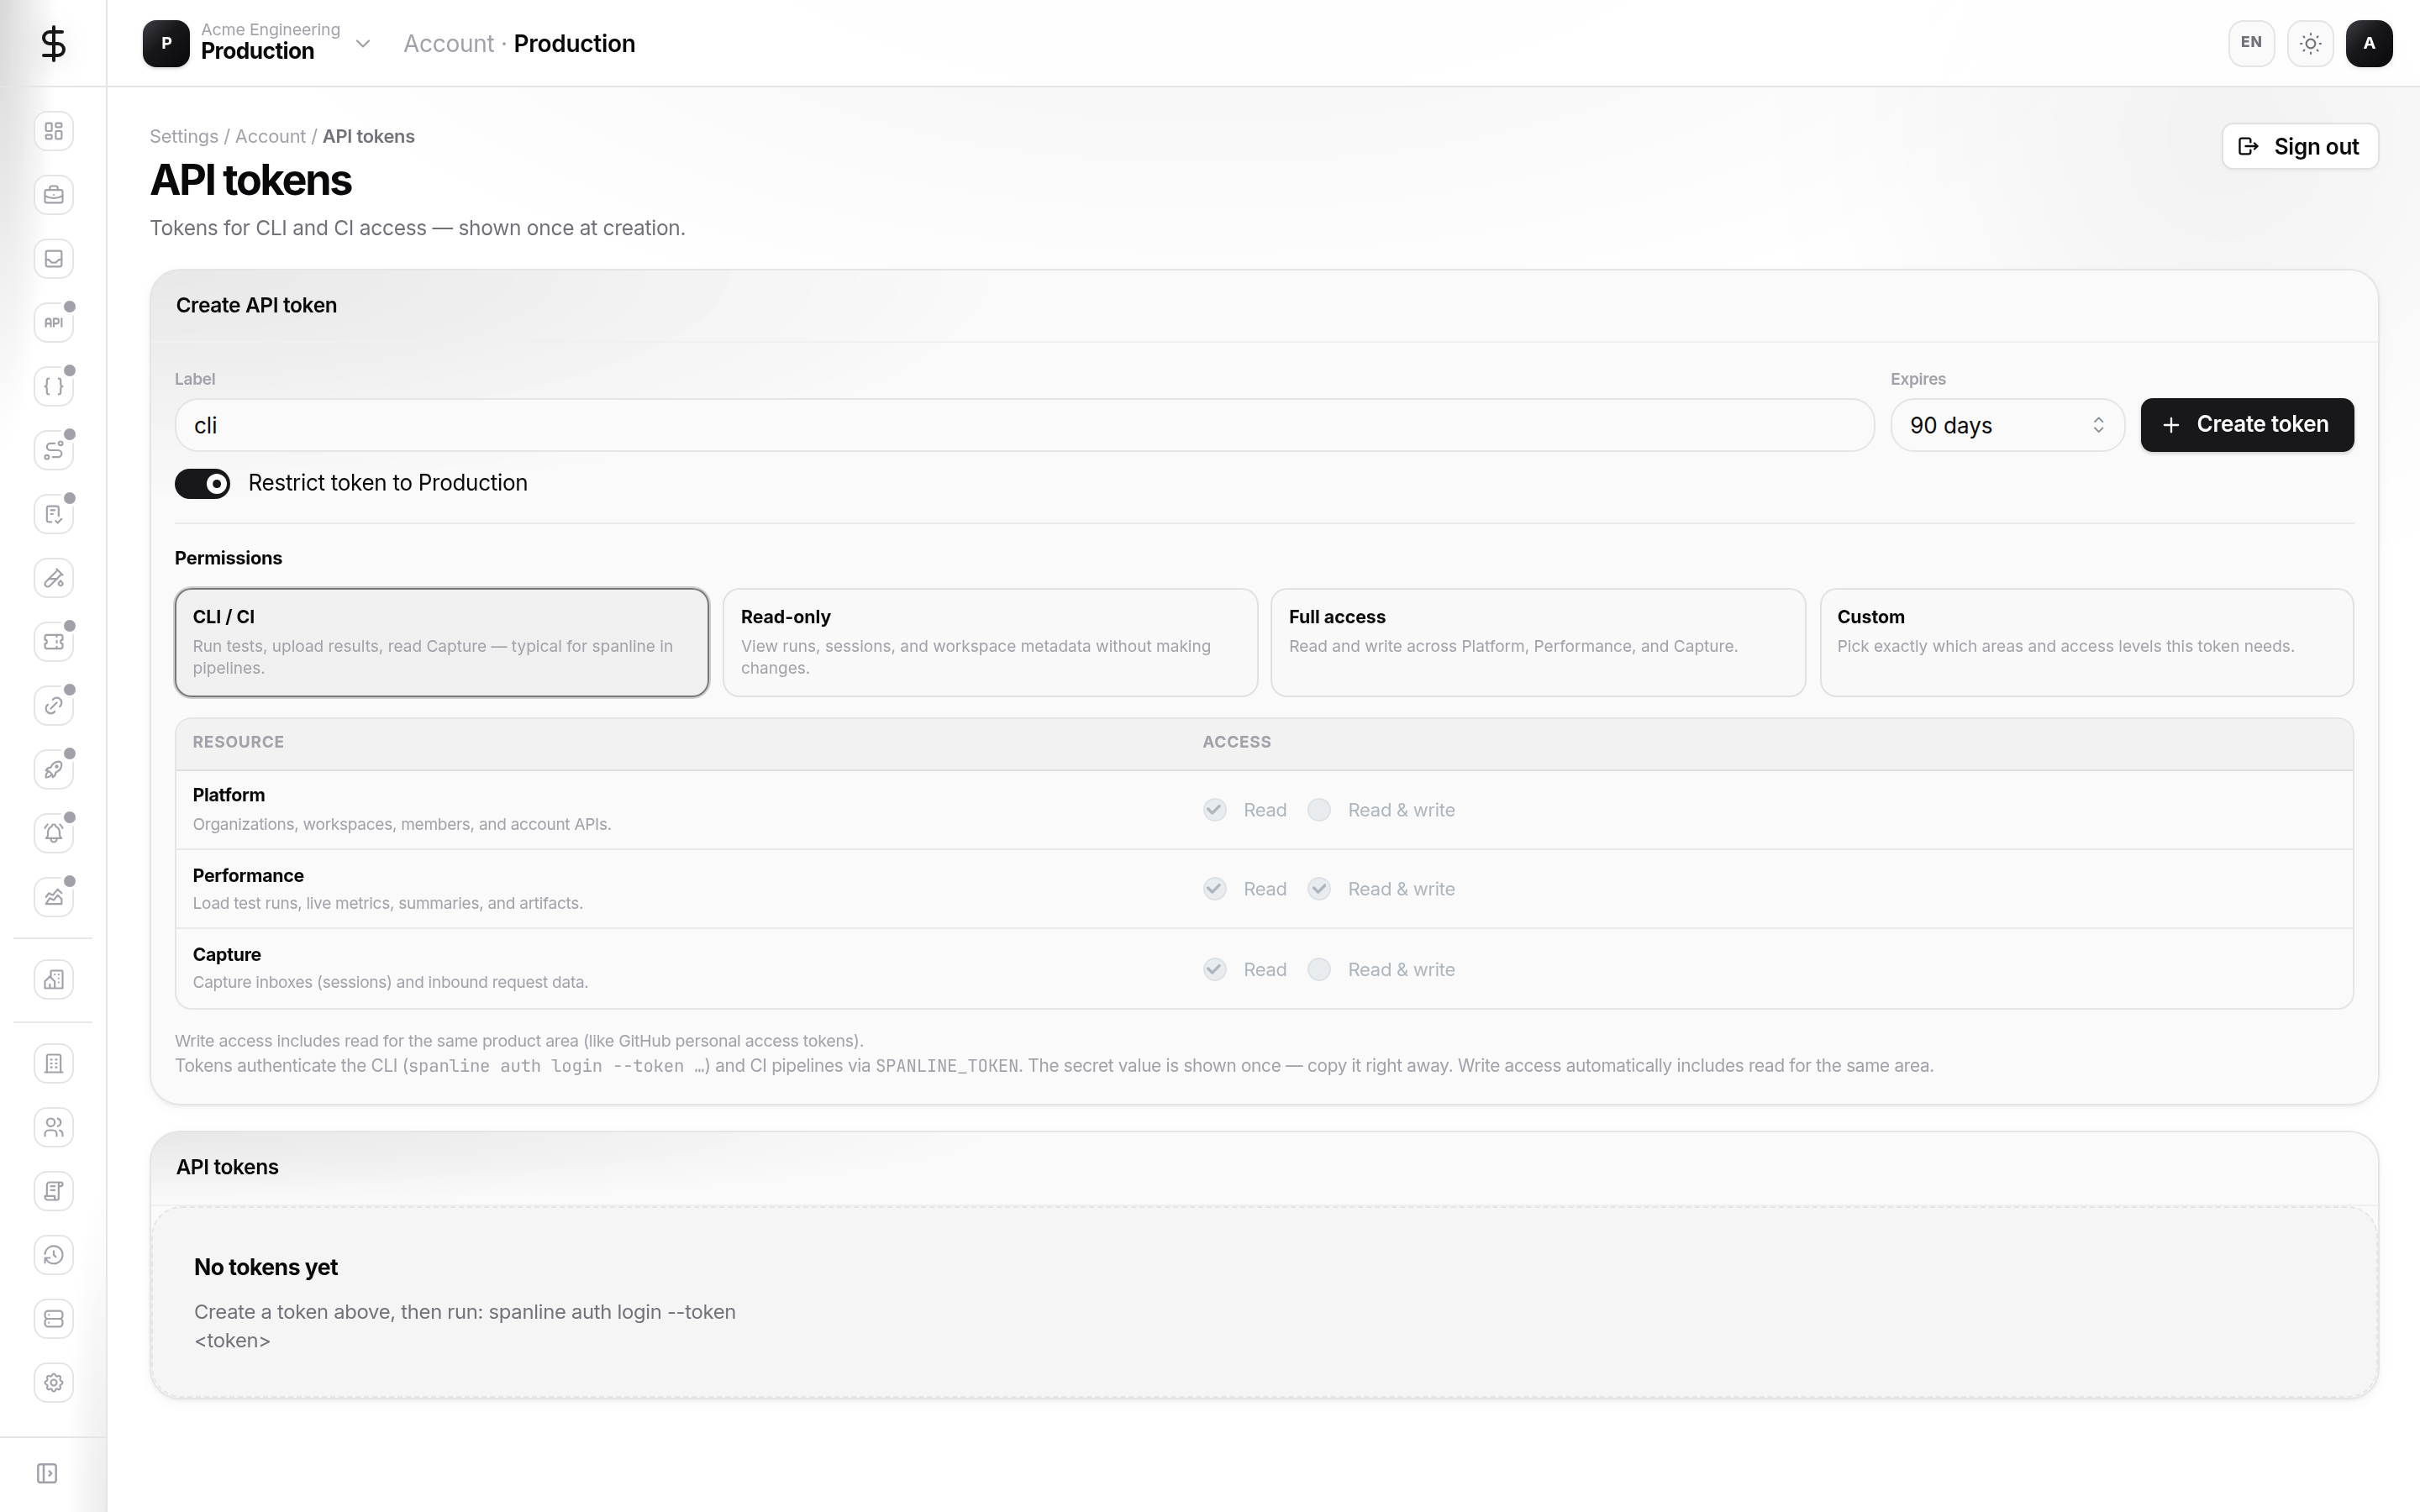
- Go to Settings → Account → API tokens (
/account/tokens). - Set a Label you will recognize later (for example
laptoporgithub-actions). - Choose Expires (90 days is a good default for laptops; CI may use shorter).
Step 3 — Choose permissions
Under Permissions, pick a preset:
| Preset | Typical use |
|---|---|
| CLI / CI | spanline test run, upload results, read Capture |
| Read-only | Dashboards, audits, no mutations |
| Full access | Read and write across Platform, Performance, Capture |
| Custom | Pick each product area: None · Read · Read & write · Full |
Write includes read for the same product area (like GitHub personal access tokens). You do not need to tick both.
For Performance test runs you need Performance · Read & write (included in CLI / CI).
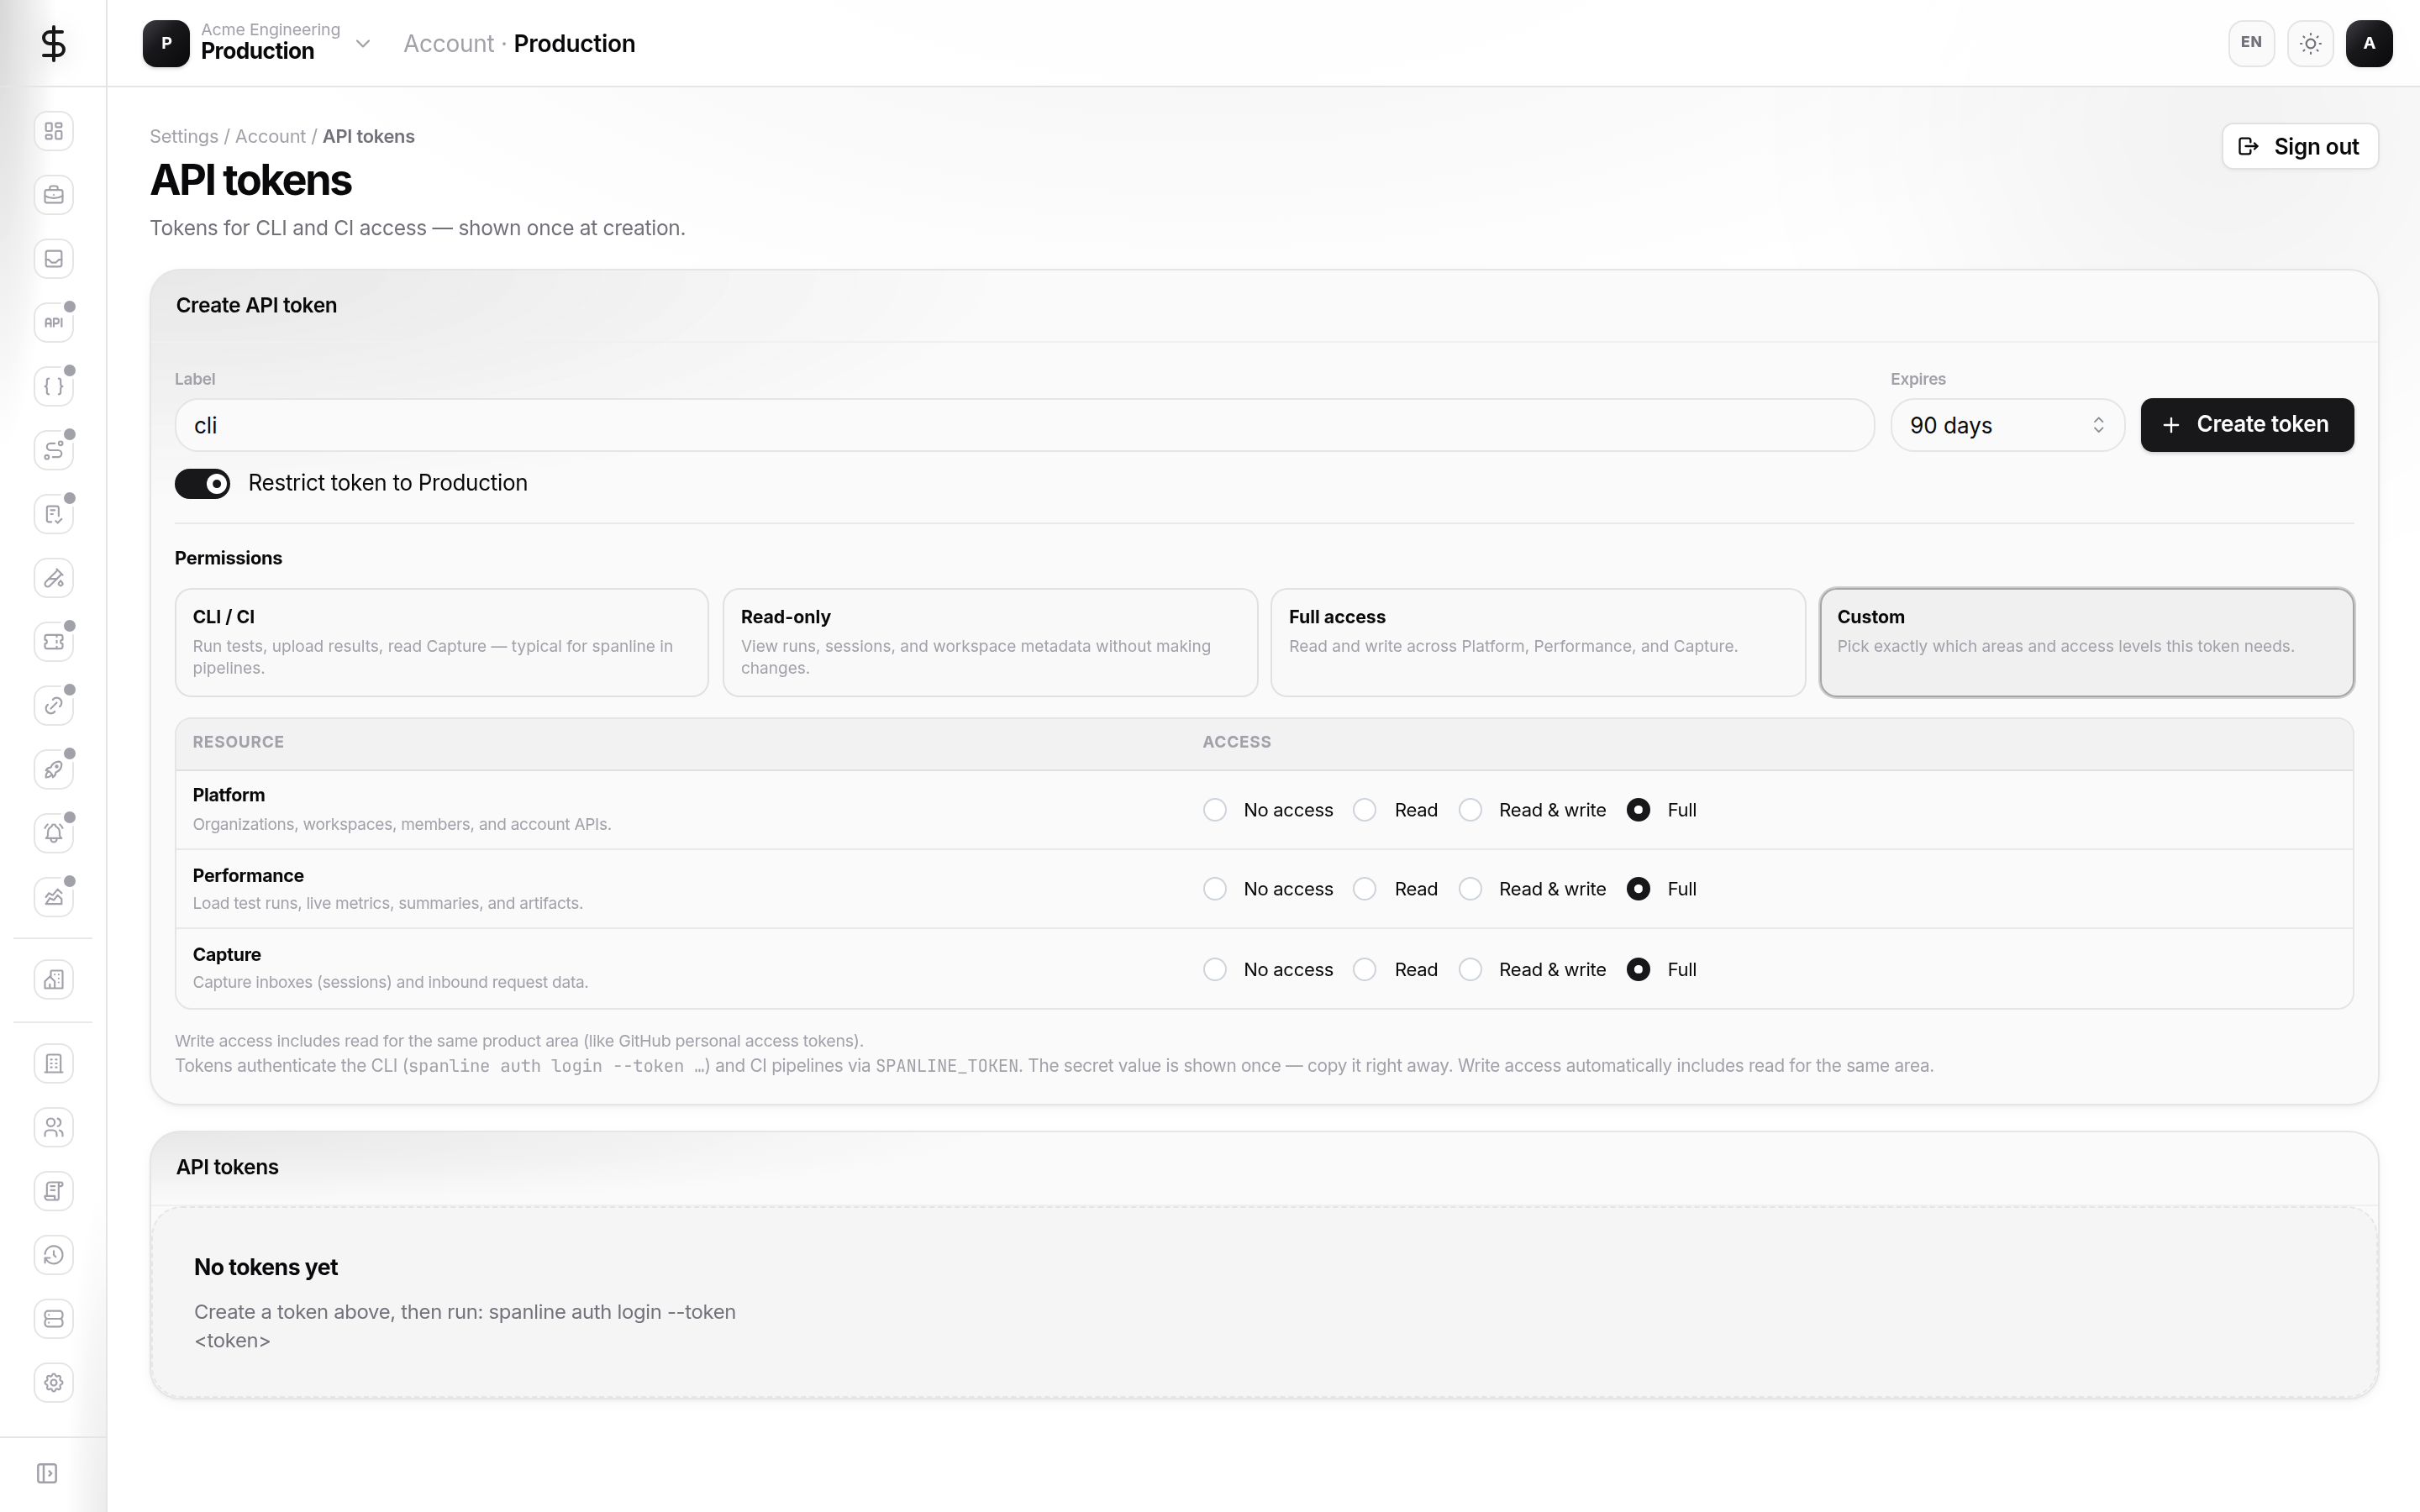
Optional: turn on Restrict token to … so the token only works in the current workspace.
Step 4 — Create and copy the token
- Click Create token.
- Copy the
sl_…value from the green reveal panel — it will not be shown again.
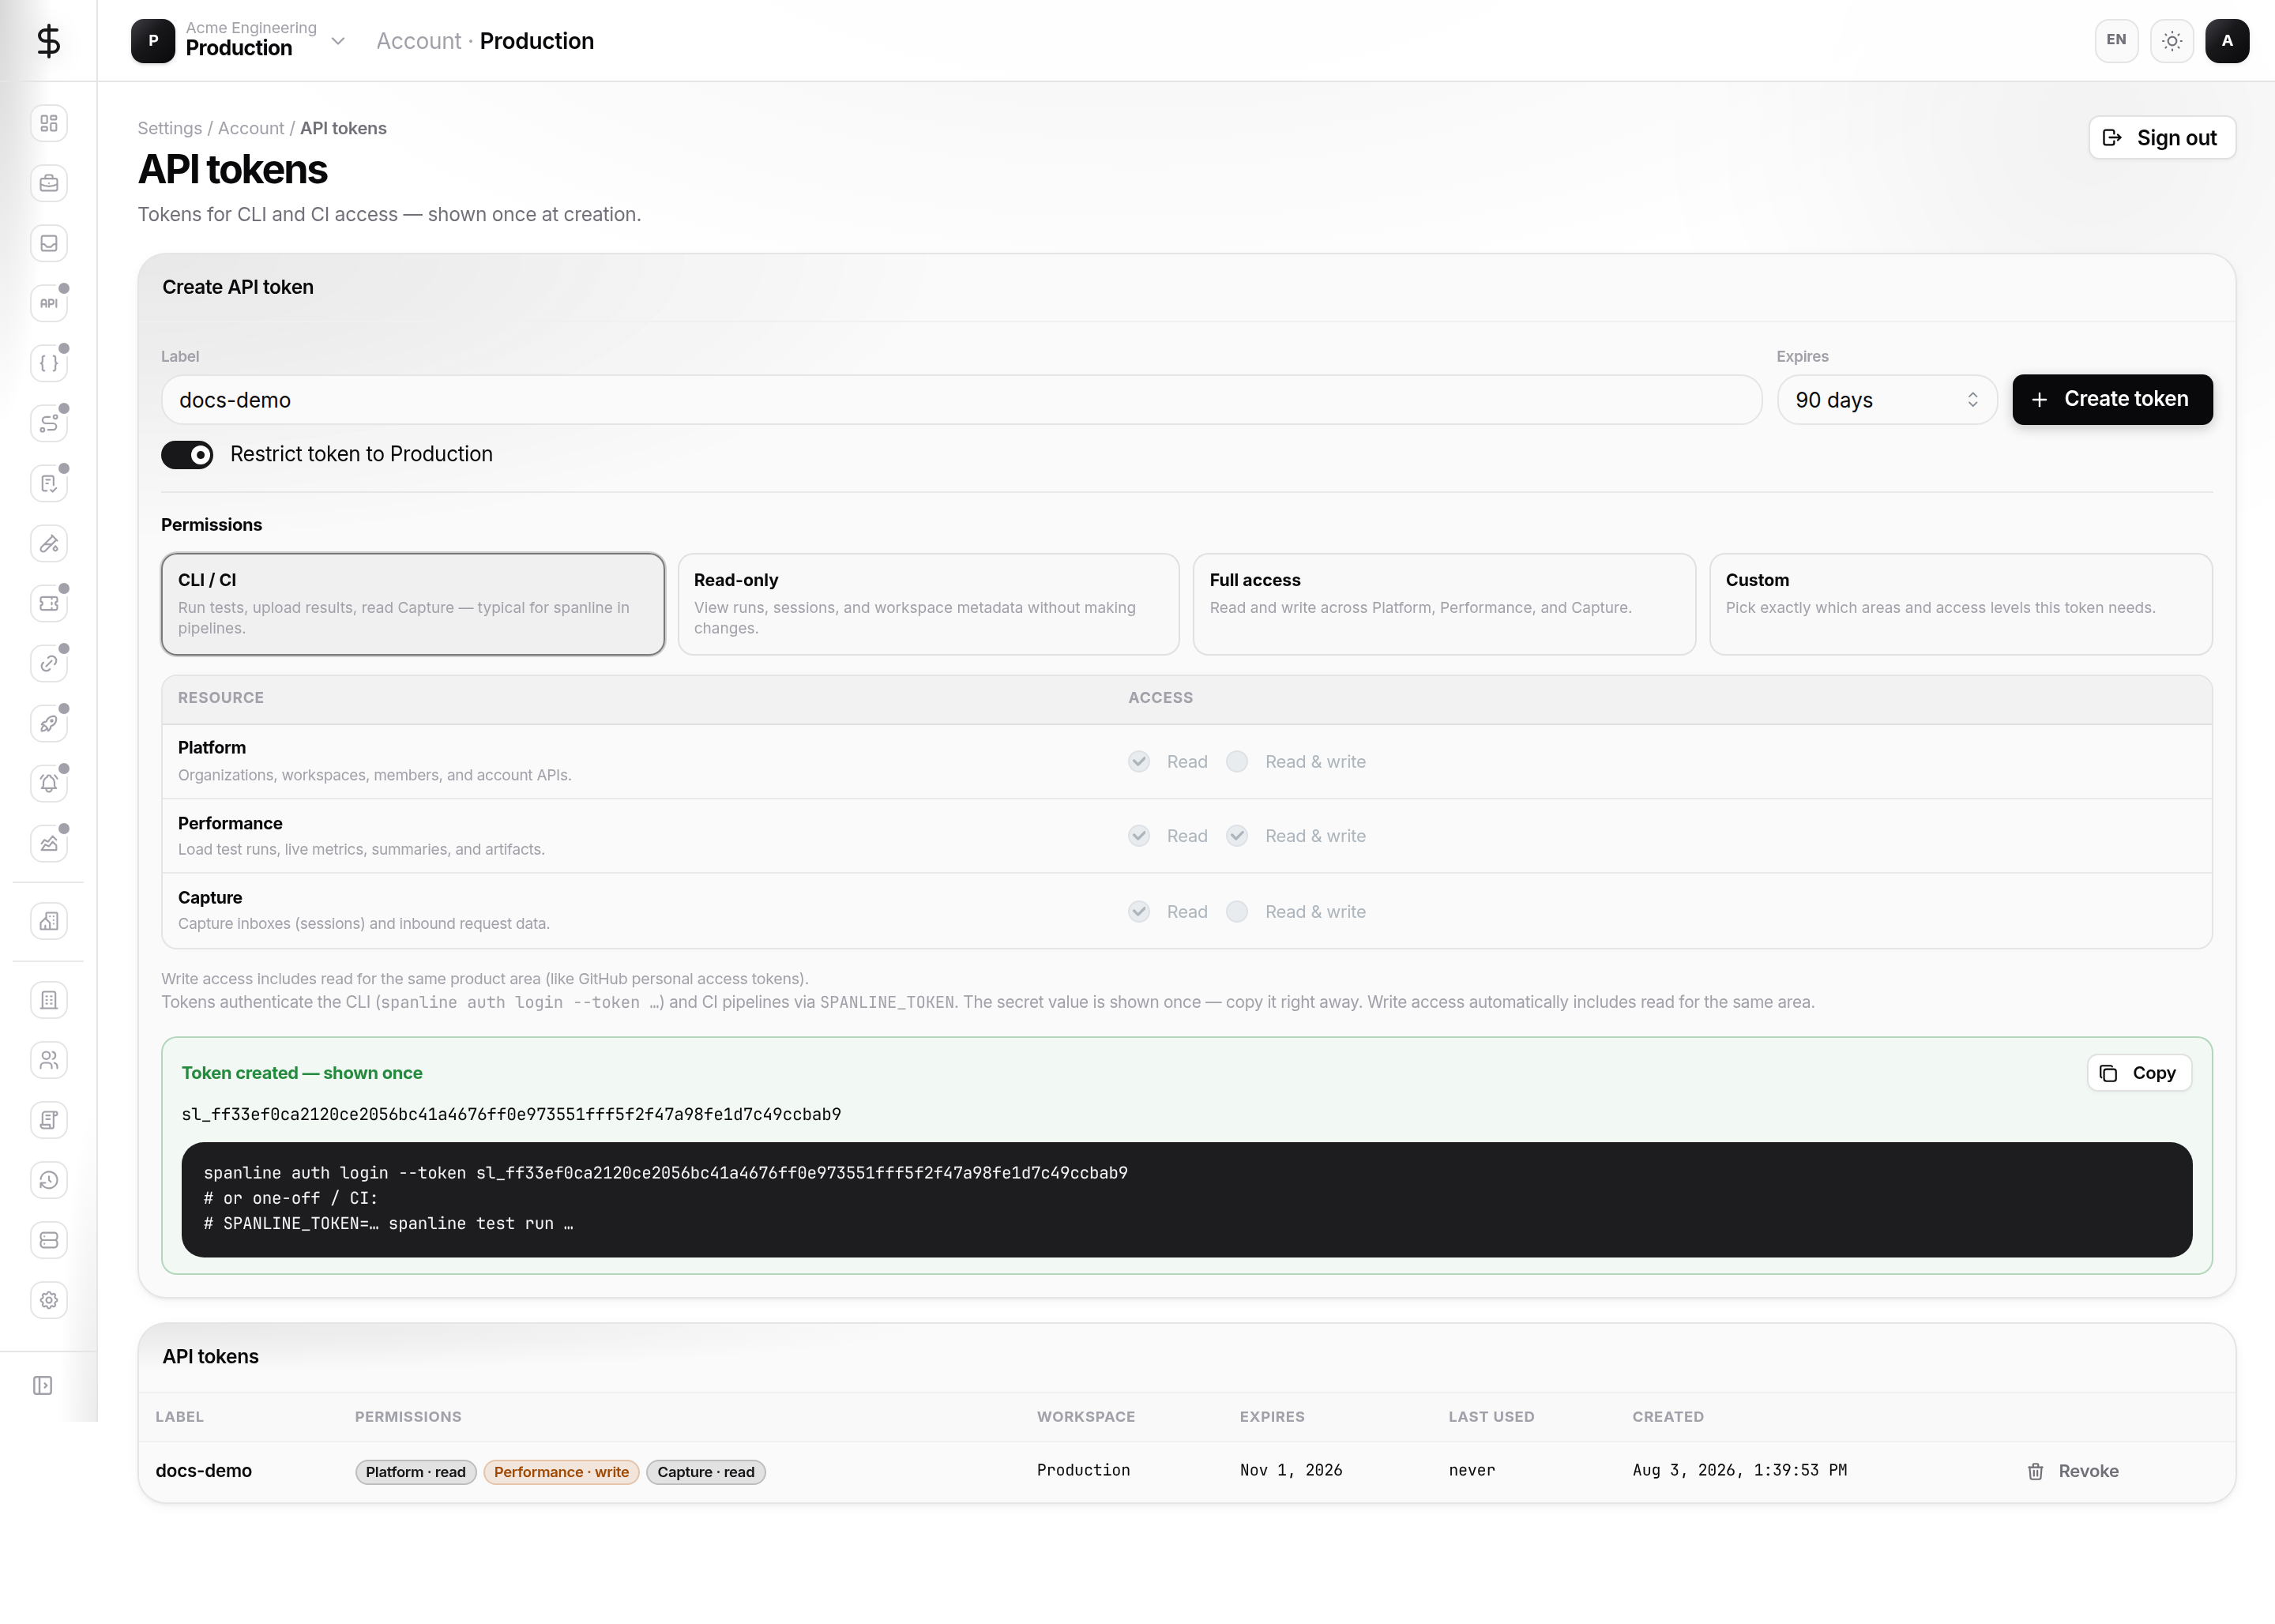
Never paste tokens into chat, tickets, or screenshots you share publicly.
Step 5 — Authenticate the CLI
On the machine that will run tests:
spanline auth login --token sl_…
spanline auth workspace list
spanline auth workspace use <workspace-name-or-id>
spanline auth status
spanline auth status should show your user, workspace, and that a token is configured.
CI one-off
For a single job you can skip writing credentials to disk:
SPANLINE_TOKEN=sl_… spanline test run --scenario-id <id>
Set SPANLINE_TOKEN as a protected secret in your CI provider.
Enterprise self-host: set SPANLINE_API to your deployment URL in CI when the default cloud API does not apply.
Step 6 — Confirm in the app
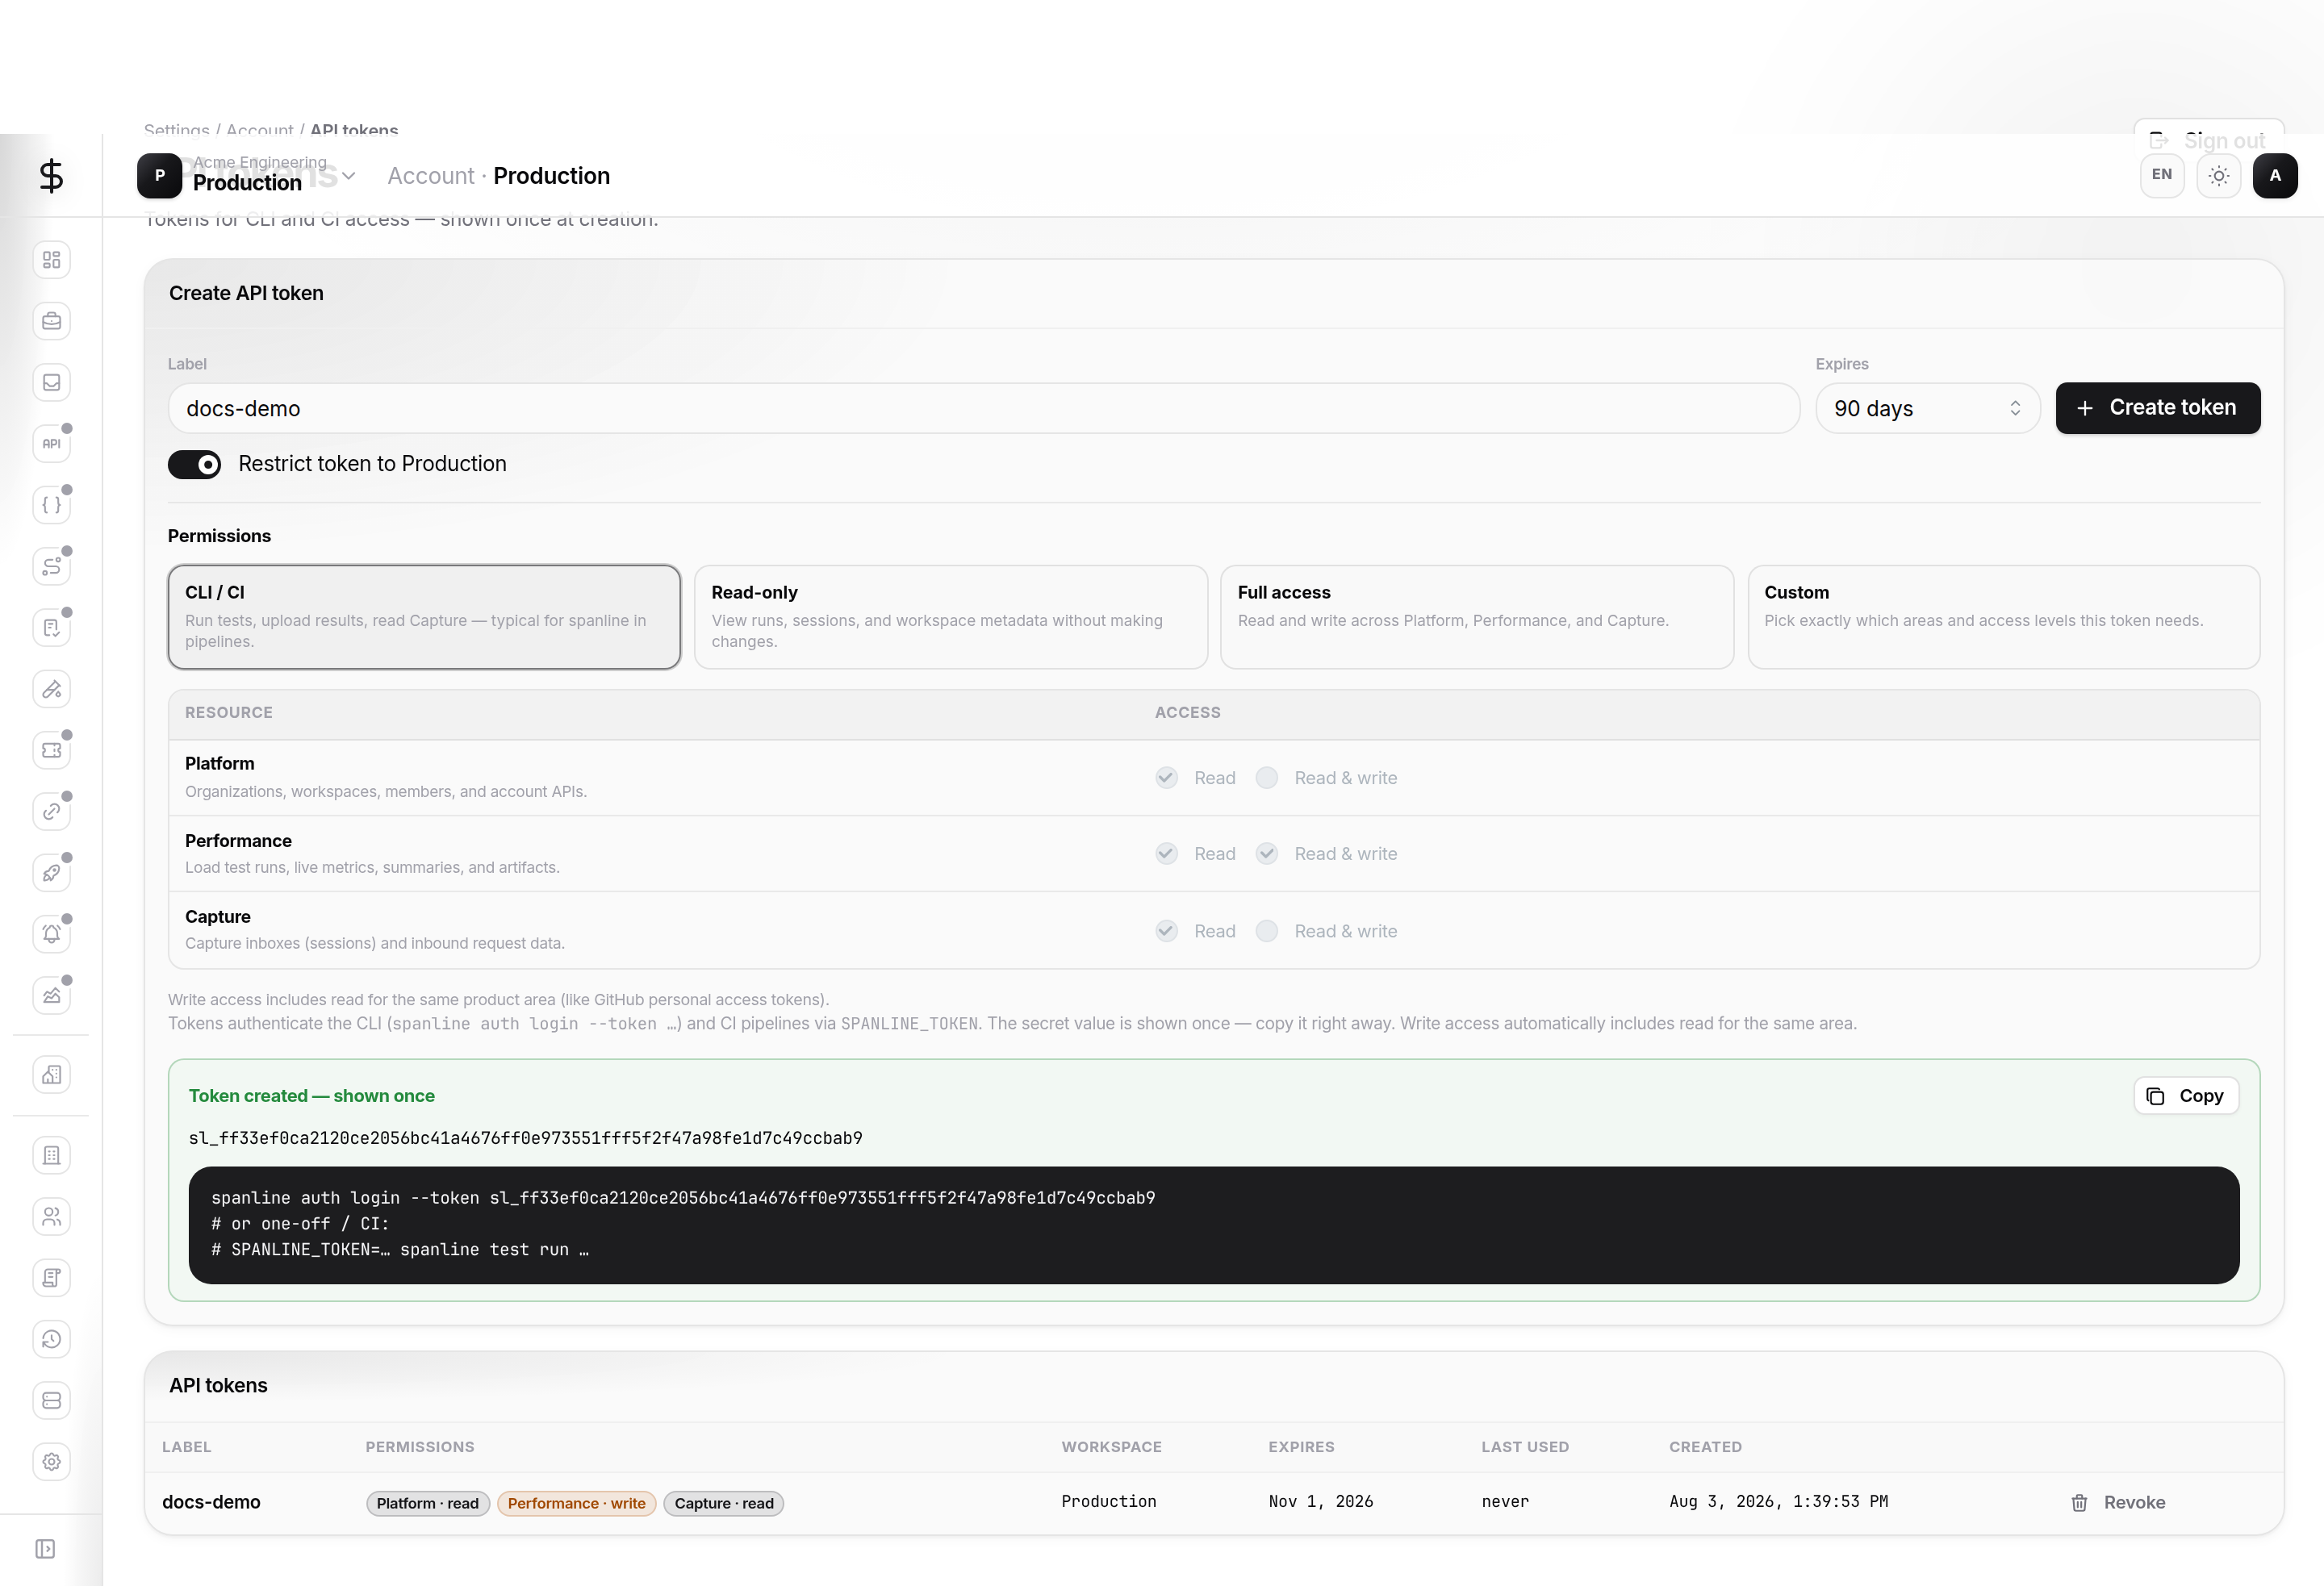
Return to API tokens. Your new token appears in the list with permission badges and Last used (updates after the first API call).
Next steps
- Guides — sessions, password, MFA
- Concepts — scopes and workspace restriction
- Performance → Run tests — k6 runs after CLI auth